01 August 2011

Fresh Peach Tart

This was the first time in my life that I made a fresh fruit tart with pastry cream. 
Let's see how it went....


TART SHELL:
Makes enough for an 18cm tart.
80g flour
20g almond meal
30g sugar
40g butter, softened

Cream butter and sugar till light and fluffy.
Add flour and almond meal.
Mix till the dough comes together.
Press the dough onto cling wrap, wrap it up, and chill it for about half hour.
Roll out the dough till large enough to cover tart pan.
Press into a greased tart pan, pressing around the edges firmly and trimming away any excess.
Chill for at least half hour.


Next, blind bake the tart shell. (This means baking the shell on its own, since it has to be pre-baked cos the filling and topping need not be baked.)


Fill the tart shell with pie weights, or beans or rice. Even coins if that's the only thing you have. Basically, anything that will weigh the shell down, so it doesn't balloon when you bake it. 


Bake at 180*C for 10-15 min or until the edges are golden brown. 
Remove pie weights and allow to cool completely.


PASTRY CREAM:
125ml milk
2 egg yolks
40g sugar
4 tsp flour
4 tsp cornflour
10g butter
1 vanilla pod or 1 tbs vanilla extract
1/8 - 1/4 tsp cinnamon (to taste)
1 tsp Cointreau (orange liqueur)

Scrape out the seeds from the vanilla pod.
Add to milk and bring to a boil in a saucepan. Remove from heat. Set aside.

Whisk together egg yolks and sugar till thick and pale.
Sift in flour, cornflour and cinnamon and whisk till well combined.
Continue whisking, at the same time gradually pouring in the hot milk.
Strain the mixture back into the saucepan (to remove lumps).
Gently heat the mixture till mixture thickens, stirring constantly to prevent lumps.
When the mixture resembles custard, remove from heat and stir in the liqueur.

Transfer to a clean bowl and cover the surface of the pastry cream with cling wrap. (The cling wrap must touch the cream; this prevents a skin from forming.)
Allow to cool completely before spooning onto tart shell.

Arrange your favourite fruit onto the top of the cream, sprinkle icing sugar, and serve!


My mother-in-law passed me some fresh peaches, so I used them for this tart. And since it was fresh peaches, the colour is paler and more varied than the canned peaches we are more familiar with.  If you are using canned peaches, remember to drain the syrup. Other fruits that would be great for this tart are any berries, cherries, grapes, kiwi... well, you get it, just about any fruit you like!


In the end, I never got to sink my teeth into this tart. 
Except for the pasty cream, which I tasted cos the little black vanilla dots in the pale creamy pastry cream was just too enticing. And boy was it amazing!  Imagine, the seeds of one whole vanilla pod crammed in a modest 18cm tart shell.  Mmmmm...


You see, since the peaches were from my mother-in-law, I thought I'd make a tart for all of us. I took the tart to her in the morning on my way out, so she could have some after lunch. By the time I returned in the evening, it was all gone  :(  Well, I guess on the bright side, it must mean that it was decent tasting at the very least. 

I am submitting this to Aspiring Bakers #10: Easy as Pie (August 2011), hosted by Janine of Not the Kitchen Sink!


*************


31 July 2011

Handmade Fettuccine al Funghi Portobello

Simple Sunday night dinner, made with handmade fettuccine in parmesan cream sauce, bacon and mini portobello mushrooms.


My DIY Card Holder

Coincidentally, I did a little piece of handicraft today too! I have been looking for a nice card holder to contain all my shopping discount / loyalty cards. I wasn't able to find anything nice, so I decided to make my own.


I have a weakness for Japanese fabric (and washi paper) and anything with butterflies print on it. I completed this in a neat 15 minutes, using fabric sticker. All I need to do was to cut and stick the fabric onto the clear multi-card holder I bought from Popular. As the kids say it, it's "easy peasy lemon squeezy".


My other hobby....

Besides baking and cooking, my other loves include knitting and sewing.

Looks like I'm born in the wrong era, wrong country.  I should be a country girl living on a farm!  LOL.  I wouldn't mind, really.  Except that I would still need the internet :)

I've been wanting to get a nice holder to store all those plastic bags we collect from our grocery shopping.  But as I couldn't find a nice and cheap one, I decided to convert an old skirt with lovely prints to a simple holder.


Grabbed my old skirt from the "to donate" box, tailor's chalk, scissors, and sewing machine.  A quick measure, snip, and stitch... voila!  Stuff the plastic bags from the top, and when you need one, pull it from the bottom end.


One skirt was perfect for two of these.  Now I have two pretty (and cheap) plastic bag holders.

Now what else can I recycle....

**********


26 July 2011

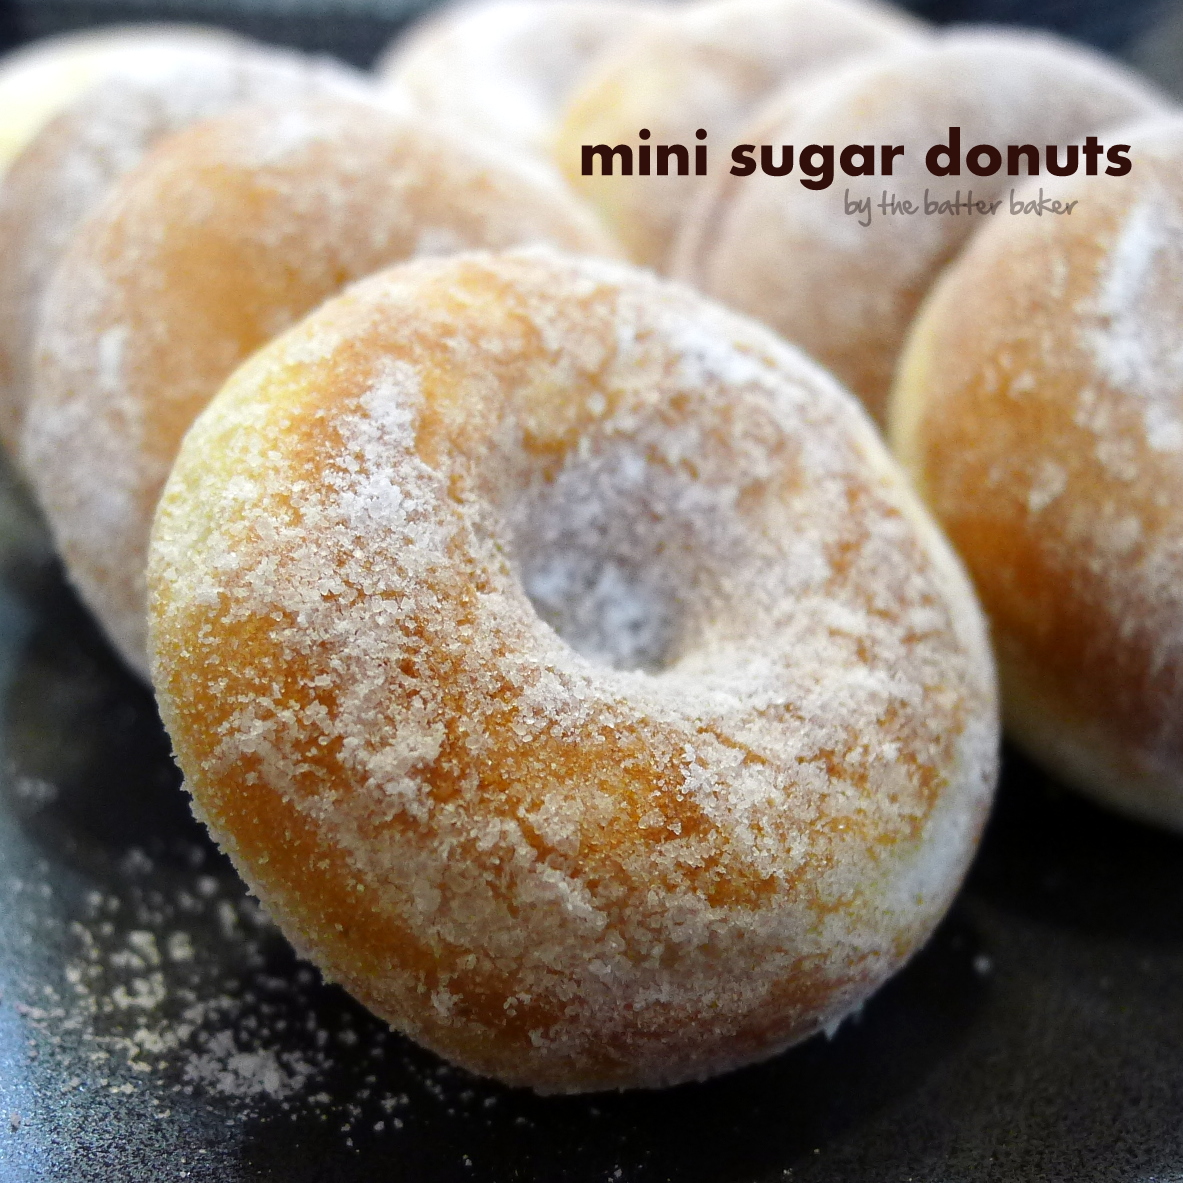
Mini Sugar Donuts (baked, not fried)

Wanna hazard a guess on the size of these donuts?


I'll give you a hint... 8 of these little ones were made from the regular sandwich-maker that fits 2 slices of bread.


The answer: Each little donut is a mere 4 cm in diameter.
These should be called Donut Pops!


I think these are just too cute! Perfect for kids and the young-at-heart :)

Mini Sugar Donuts
Makes about 30 minis.

1½ cups plain flour
½ cup sugar
1½ tsp baking powder
1/4 tsp salt
100g butter, melted
¾ cup milk
1 egg

For dusting:
Castor sugar or snow powder
Cinnamon powder (optional)

Turn on the donut machine to preheat.
Meanwhile, whisk all ingredients together till you get a batter that resembles pancake batter - thick but pourable.

When the donut machine is heated, scoop, pour or pipe batter into the moulds, close the lid and cook for about 2-3 min. (It's inevitable that the bottom half will be browner than the top.) When donuts are a nice golden brown on either side, remove from moulds and cool them on a wire rack.

When donuts have cooled, combine sugar and cinnamon powder in a plastic bag, dump in some donuts and shake till they are coated with enough sugary goodness to your liking.


Ready for some mini donuts and a cuppa coffee?

*********

25 July 2011

Wholemeal Bread (sponge starter method)

After my success with the water roux method of bread-making, I thought I'd give the sponge method a try. 


My first attempt last week resulted in a disappointing loaf. The recipe for the sponge had such a high proportion of flour that the sponge didn't develop the way it's supposed to be. So it took forever for the dough to rise, and the resulting loaf was dense.

This time round, after more Googling - what would we do without Google these days - I reduced the flour for the sponge starter, and it foamed up beautifully. However, I still didn't get the nice rise I got from my water roux loaf. Could it have been the wholemeal flour that caused the heavier and denser dough? Or was it the method?

With the water roux method, the bread also lasted several days, retaining it's soft and fluffy texture. But for this sponge bread, it turned dry and crumbly after two days. Does this happen for you too?


Many of you have a lot more experience in bread making than I do. So if you have any tips for me and the other readers, or if you'd just like to share your experience, I'd love to hear from you. Which bread-making method do you favour? What's the 'trick' to soft fluffy bread - is it the method, or some secret ingredient?


Here's the recipe I used...

Sponge Starter:
65g bread flour
20g sugar
1 tsp instant yeast
125ml warm water

50g wholemeal flour
170g bread flour
1 tsp salt
10g milk powder
1 egg
2 tbs water
20g margarine


Combine all sponge starter ingredients and set aside for about 30 min till foamy.

Combine the rest of the ingredients in another bowl, then add the starter. Mix everything together till a dough forms. Knead for about 10 min till dough is smooth. Then place in a well-oiled bowl and cover with cling wrap and let it rise for about 45 min till double in size.

Punch down the dough to release the air. Let it rest for 5-10 min.
Shape dough into a loaf and place in a greased and floured loaf tin. Let it proof for about 30 min till double in size. Before baking, sprinkle some flour over the top (optional).

Bake at 180*C for 30 min.
Remove from loaf tin and allow to cool completely on a wire rack before slicing.

***********

Carrot Pasta

Remember my post on my new toy - the pasta machine?

I decided to be a little adventurous and experimented with a flavoured pasta. I thought I would get nice orange-coloured pasta... but in the end, I got what looked more like ee-mee.  LOL!

Nevertheless, hubby still gave the thumbs up for taste and texture. Looks like the remaining pack of dried pasta in the pantry will be sitting there for quite a while longer...


For this batch, I doubled the recipe here. But instead of using 2 eggs, I used 1 egg and replaced the second egg with the same amount of carrot puree. Perhaps next time, I'll add some tomato puree to see if the orange colour will be enhanced.

Stay tuned for more pasta dishes  :)